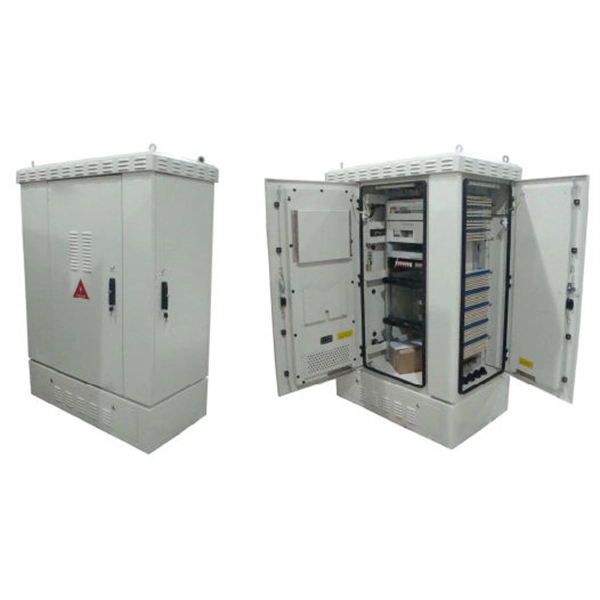
Here are some top ways to seal and waterproof your db box: Use waterproof sealants like silicone, polyurethane, or butyl rubber around doors and seams. Protect cables and connections with waterproof fittings and seals. Schedule regular maintenance and inspections to check for leaks. It is essential to use correct installation techniques to keep your outdoor electrical box waterproof. Follow these five steps for a secure install: Pick the right spot. Ensure children and pets can't reach it. Use a waterproof electrical box that meets industry standards. But in the real world, it also faces sun, heat, cold, vibration, and bad installation habits. I often tell clients that an outdoor box is like a rain jacket. For outdoor outlets, use a gfci outdoor outlet with. Regular care keeps your outdoor power distribution box functioning properly and your home safe in bad weather. Check your outdoor power box often for water damage. Finding problems early saves money and keeps it safe. Clearing trash prevents rust and. This article aims to provide a comprehensive guide on how to effectively cover an outdoor electrical box. The information presented covers the importance of weatherproofing, the selection of appropriate covers, the steps involved in installation, and essential safety precautions. Let's take a closer look at NEMA ratings and other weatherproofing considerations for.
[PDF]

What you get is a Mini-ITX motherboard that measures 17 cm x 17 cm. You get all the features you need, however, there is often significantly fewer than bigger form factors. B (before numbers) is lower tiered boards for both intel (#60)/amd (#50). X (#70) is high end amd boards. And specifically X399 is generation 1/2 amd threadripper, x299 is intel core-x series. Edit: for clarity, "#" is in. A small motherboard is one of many motherboard types. The motherboard is one of the most critical computer components, it carries and provides power to the individual components while being the path for communication. The most common form factors include ATX, Micro ATX, and Mini ITX. E-ATX (extended ATX) platforms stand at a whopping 30. Their wider footprint allows for more components to be installed onto the motherboard. You get a comfortable number of DIMM slots, an extensive rear I/O, a plethora of connectivity options, and top-of-the-line VRM designs. It was first introduced by Intel in 1995 and has undergone several revisions since. Expansion Slots: The ATX standard typically includes up to seven expansion slots, allowing for. A small motherboard form factor can fit into a space constraint and small form-factor industrial computers. 5" PICO-ITX, and the smallest 1. 8" FEMTO ITX is starting to make an appearance in the embedded.
[PDF]
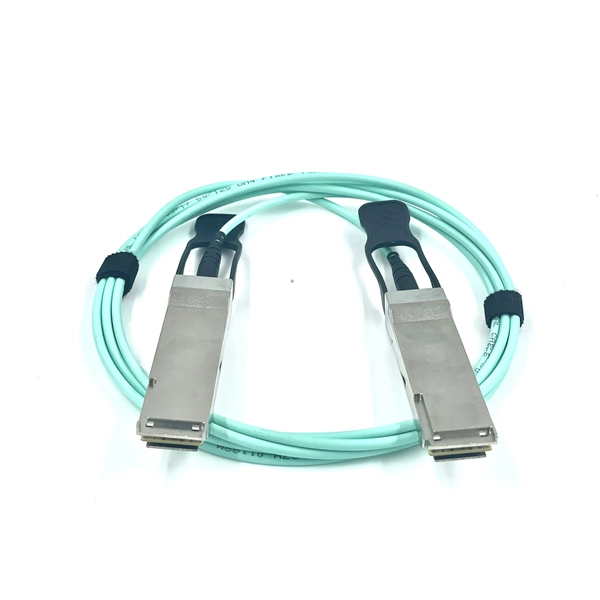
This guide delves into the structure and working principle of fiber optic connectors and outlines the critical steps for creating a successful connection. Proper connection of fiber optic cables is essential to harness these benefits fully, as even minor errors can lead to significant performance issues like signal loss. This article will guide you through the necessary tools, materials, and methods on how to connect fiber optic cables effectively. The FCR-1000 series cable reels are designed to fit Princetel's standard FORJs and slip rings. The rotary joints are protected inside the drum for durability and seamless deployment of single or multi-channel fiber optic and/or electrical cable with uninterrupted optical and/or electrical signal. Fiber optic connectors play an essential role in the realm of optical communication, enabling seamless connections between fiber optic cables. This guide will walk you through the complete process of connecting fiber optic cable. Before connecting any fiber cable, you need to assemble the proper preparation tools: With the right tools in hand, follow these key steps to achieve reliable fiber connections: 1. Strip and Clean Fiber Ends. In this video, we'll guide you through preparing and terminating fiber optic cables using SimplyFiber products, known for their high quality, ease of use, and reliability. more Audio tracks for some languages were automatically generated. Learn more In this video, we'll guide you through.
[PDF]
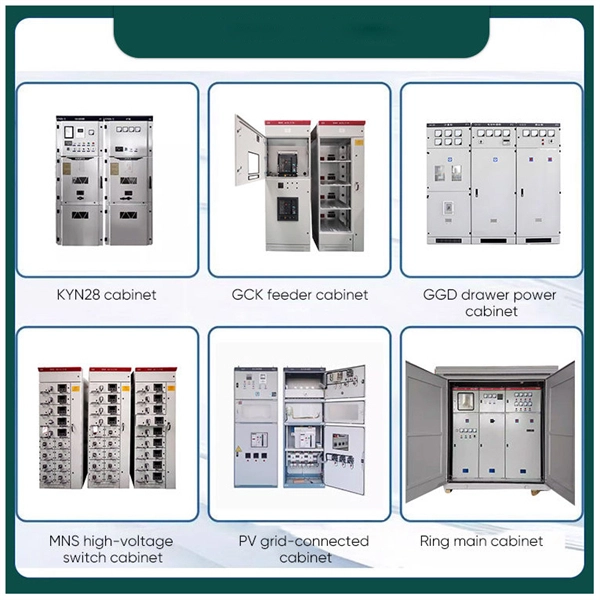
Voltage/BIL: 35 kV class, typical BIL 170 kV. Short-circuit: 25–40 kA short-time withstand common; confirm with system fault study. Continuous current: 1250–3150+ A bus and feeder options. Standards: IEC 62271-200; internal arc testing per IEC/TR 61641 if specified. The Insulation levels for Distribution, Class 1 and Class 2 transformers shall be selected from this table for both the high-voltage and low-voltage windings. All test levels are line to ground. The applied test levels are not applicable to wye-connected windings unless they have been specified to. PURPOSE: To provide general construction requirements for representative wood pole structures and assemblies for 34. 5 through 69 kV transmission lines. 2-1. Most distribution voltages are between 4 and 35 kV. In this article, unless otherwise specified, voltages are given as line-to-line voltages; this follows normal industry practice, but it is sometimes a source of confusion. A voltage class is. This article is for manufacturing, testing of non-segregated Bus Bars and Bus Ducts rated 600 V to 35 kV as per international standard ANSI C37. Air insulation with generous. Rated maximum voltage, kV BIL, kV Manufacturing Date: MM/YYYY Rated continuous current, A Rated load interrupting rating, A Momentary current rating, kA asym. Close & latch rating, kA asym. Liquid dielectric volume (gallons) – Liquid-Filled Units Only SF6 Weight, Pressure – SF6.
[PDF]
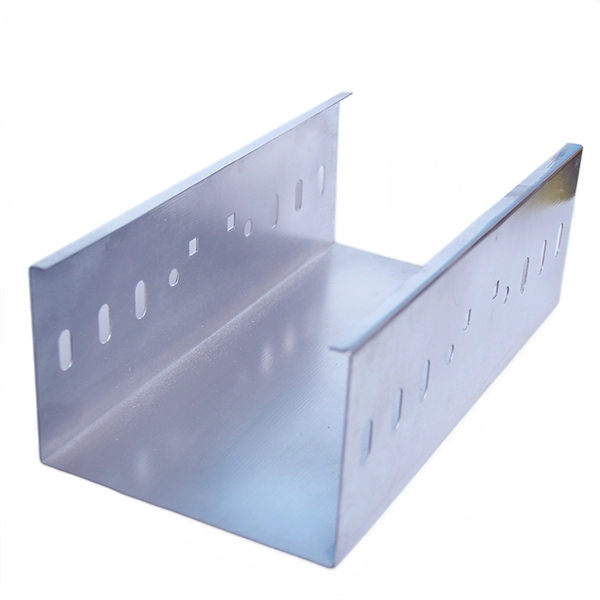
This comprehensive guide will cover the step-by-step installation methodology for power-electrical bus bars, emphasizing safety measures and best practices. Bus bars play a crucial role in electrical distribution systems by providing a reliable and efficient way to conduct electricity within electrical panels. Whether in industrial, commercial, or residential applications, bus bars in electrical panels enhance power distribution, reduce wiring. Busbars are the unsung heroes of electrical panels, ensuring reliable power distribution and minimizing clutter. If you've ever wondered how to achieve a flawless busbar installation, you're in the right place. This guide will walk you through every step of the process, from selecting the right. Ever wondered how busbars, the unsung heroes of electrical distribution, are processed and installed? This article delves into the intricate steps of busbar selection, preparation, and installation, ensuring efficient and safe power distribution. You'll discover the essential tools and techniques. This prevents the parts from moving and causing a dangerous short circuit. It is a very reliable way to move energy. Most are made of copper or aluminum because these metals carry current well. The busbar shims and hardware bag in the cubicle packaging. Refer to Access to the Busbar Compartments.
[PDF]
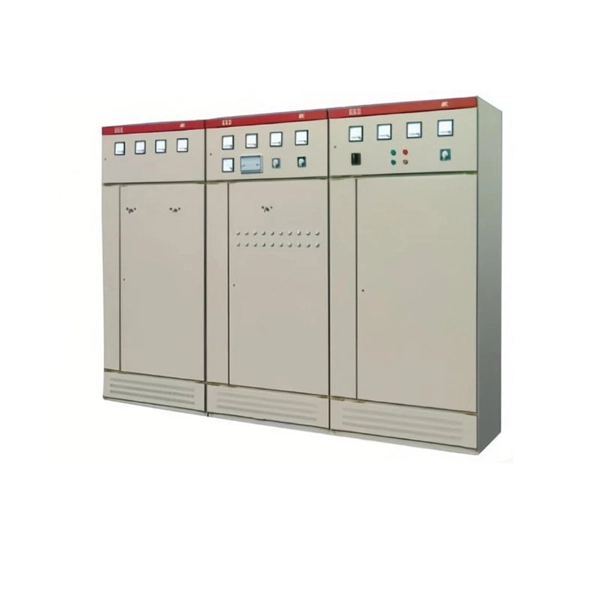
Check for proper IP/NEMA ratings and material quality. Ensure safe placement: install in dry, accessible areas with good ventilation and at appropriate height (typically ~1. Practice good wiring: secure grounding, neat cable management, proper insulation, and correct wire gauge. In this guide, we'll break down everything you need to know to install a distribution box correctly and confidently. Choose the right box based on environment (indoor/outdoor), load capacity, and durability. It is usually equipped with circuit breakers, fuses, terminal connectors, and other components. It is mainly used to isolate fault circuits, prevent overload, and ensure the safe operation of. Learn how to wire a distribution box step by step! This video shows real on-site footage of electrical installation, demonstrating safe and standardized wiring methods used by professionals. Follow this guide for a clear and safe connection process: Before starting, always ensure the main power is turned off to avoid electrical shock. It serves as a central hub for distributing electricity throughout a building, ensuring that power is delivered safely and efficiently to all the required locations. Mark and Drill: Confirm the installation place (the method is above) and mark on the wall or installation surface with a marking pen. Distribution Box Installation: Put the distribution box on the.
[PDF]
In this research, an analysis of the electricity market in Ecuador is carried out, a portfolio of projects by source is presented, which are structured in maps with a view to an energy transition according to the offic.
[PDF]