Standard rack installation: $500 to $2,000 per rack. Equipment Costs. The costs associated with rack and stack solutions can vary significantly depending on several factors. These include the size of the installation, the complexity of the equipment, labor costs, and infrastructure requirements. Size of the Data Center The scale of the data center plays a large. Check each product page for other buying options. VEVOR 9U Wall Mount Network Server Cabinet, 15. 5" Deep, Server Rack Cabinet Enclosure, 200 lbs Max. Ground-Mounted Load Capacity, with Locking Glass Door Side Panels, for IT Equipment, A/V Devices Need help?. 9U Wall Mount Network Server Cabinet, 15. Did You Find It?. The 9U rack is an ideal choice for smaller setups, that provides enough space for easy access and airflow. 9U 18" Depth Wall Mount 19" Enclosure SR. Transit within 4-6 business days 19" Wall Mount Server Rack Cabinet 9U (24"w x18"d x20"h) (. Transit. This SmartRack® 9U rack enclosure is designed for home and office network wiring closets, retail locations, classrooms, back offices and other areas with limited floor space where you need equipment to be secure, organized and out of the way. Constructed from heavy-duty steel with a durable black. Learn why IT Pros trust StarTech. com for performance connectivity accessories.
[PDF]
This video shows real on-site footage of electrical installation, demonstrating safe and standardized wiring methods used by professionals. In this guide, we'll break down everything you need to know to install a distribution box correctly and confidently. Choose the right box based on environment (indoor/outdoor), load capacity, and durability. Check for proper IP/NEMA ratings and material quality. more Learn how to wire a distribution box step by step! This video shows real on-site footage of. Sufficient pre-installation preparation is the basis for the safe and smooth installation of the distribution box, mainly including the following aspects: Conduct a detailed survey of the installation site to determine the installation location of the cable distribution box. The installation. The ideal location to install electrical distribution boxes should keep a distance from water, flammable and explosive substances and corrosive substances. If they need to be placed outdoors, especially in high humidity, you must ensure their waterproofness. It serves as a. Installing a power distribution system involves a series of well-defined steps that ensure both safety and efficiency. Each phase of the installation process is designed to guarantee the proper functioning of the setup while minimizing the risk of errors or hazards. By following the correct.
[PDF]
HUAWEI WDM replacing the optical module video shows you how to replace an optical module. HUAWEI WDM Documentation:. This section describes how to install an optical module. The method used to install a copper transceiver module is the same, except that the copper transceiver module connects to a network cable instead of optical fibers. Never look directly into an optical module or the ends of optical fibers. Step 2: Take out the optical module, ring and label up, the gold finger is facing down, Note that the right. To avoid component damage caused by improper operation, we should strictly follow the following procedures for installation. 6 Parts Replacement l The BMC serial port, SYS serial port, and GE electrical port are standard RJ-45 ports, and their cables can be installed in the same way.
[PDF]
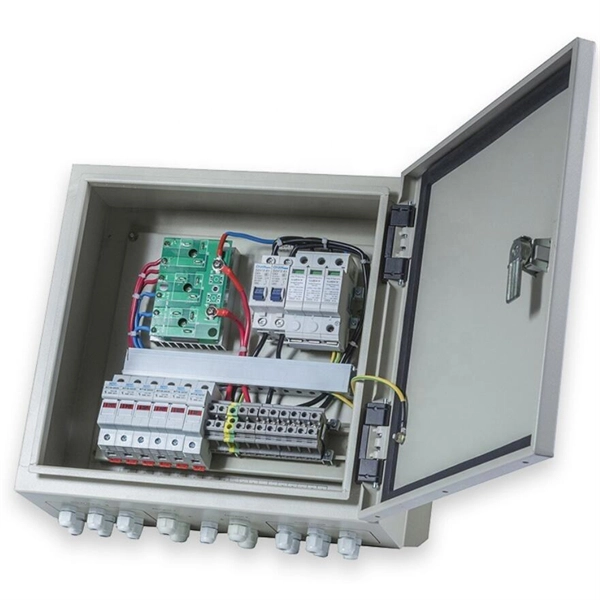
Whether upgrading an aging electrical panel or setting up your facility, this guide will walk you through the critical steps to installing an MCB Distribution Box safely. Whether you are an electrical contractor or a construction brigade, knowing how to properly and safely install distribution boxes is the basis of ensuring the safe operation of the entire system. This article details the process of installing them, which helps you comprehend distribution boxes. Learn how to install a distribution box safely and correctly. Covers wiring, placement, standards, and expert tips for a compliant setup. A distribution box is the heart of any electrical system. It takes the incoming power and safely distributes it to different circuits throughout your building. Learn how to wire a distribution box step by step! This video shows real on-site footage of electrical installation, demonstrating safe and standardized wiring methods used by professionals. It serves as a central hub for distributing electricity throughout a building, ensuring that power is delivered safely and efficiently to all the required locations. A cable. Receiving, handling, storing and install-ing this equipment should only be accomplished by qualified electri-cal personnel. Additional installation information regarding installation procedures following the equipment placement, is covered in the equipment's specific Instruction Booklet.
[PDF]
Learn how to install a centered light switch or outlet in the middle of a 2-gang electrical box to provide extra room for bulky wiring. Use the links to find. An electrical box cover serves a dual function in any residential or commercial setting, whether for a junction box, switch, or outlet. This plate provides a barrier to protect the delicate wiring connections within the electrical box from damage and debris. Simultaneously, it conceals the. In this guide, we'll break down everything you need to know to install a distribution box correctly and confidently. Choose the right box based on environment (indoor/outdoor), load capacity, and durability. Check for proper IP/NEMA ratings and material quality. Ensure safe placement: install in. The new junction box and exposed work cover for the electrical outlet and light switch are prewired before installing in the attic. Use the links to find the correct solution: 1 Gang. Choosing and installing a light switch box cover is a simple, five-minute DIY project that instantly upgrades a room's appearance. It primarily involves turning off the power, removing two screws, and attaching the new plate. A switch box is a crucial component of any electrical system, allowing you to control the flow of electricity to various devices or lights.
[PDF]
Wondering if you need a beam splitter for your microscope or slit lamp? Here's how to install one and what benefits it can offer. Beamsplitters are optical components used to split input light into two separate parts. Beamsplitters are also ideal for fluorescence applications, optical interferometry, or life science or semiconductor instrumentation. Light. It is not necessary to schedule a meeting with an engineer to install your recording system anymore. You can buy with our sales team or one of our distributors, and install it yourself in a few minutes. If you already have purchased your beam splitter, you should watch Dr. This precise ability to split light by wavelength makes beam splitters essential in various fields, including laser systems, semiconductor. Thorlabs offers a wide range of optical beamsplitters. Our plate beamsplitters have a coated front surface that determines the beam splitting ratio while the back surface is wedged and AR coated in order to minimize ghosting and interference effects. Pellicle beamsplitters provide excellent. Optical splitters offer a cost-effective and dependable solution across various fiber optic applications. It is a crucial part of many optical experimental and measurement systems, such as interferometers, also finding widespread application in fibre optic telecommunications.
[PDF]
Shut off seal water and lube inlet and install button head fitting. Remove old packing and lantern ring. Inspect and clean shaft and gland. Install compatible braided packing ring in the bottom of the stuffing box; cut on 45° angle from top to bottom. The following steps have been devised to ensure e ALL THE OLD PACKING FROM THE STUFFING BOX. Clean box and shaft thoroughly and ex mine shaft or sleeve for wear and scoring. Re SS-SECTION OF PACKING OR DIE-FORMED RINGS. To determine the correct packing. In our previous guides, we discussed two common ways to protect rubber O-rings: silicone grease and technical petroleum jelly. Both methods have their advantages. But why is O-ring protection so important? The answer lies in prevention. CHOOSING THE CORRECT. Before starting the installation, finding a proper place for putting the distribution box is crucial, because it largely decides the safety and convenience of maintenance. Accessibility is one of the most. Examine the rings, this will show how the packing was installed. Look for glazing on the OD of packing, this means rings were not preloaded, and they were turning with the shaft. Replace shaft sleeve if. One of the most important steps that is often overlooked in pump packing installation is inserting the rings into the stuffing box. Poor maintenance practices are sometimes used, and these can be really costly with more maintenance time to adjust, more leakage and loss of product, and shorter.
[PDF]
In this step-by-step tutorial, we'll cover: ✅ Tools you need ✅ Safety precautions ✅ Mounting the box ✅ Wiring tips ✅ Final checks Perfect for beginners, DIYers, and electricians who want a clear installation guide. more Learn how to properly install an electrical box safely. A distribution box is the heart of any electrical system. It takes the incoming power and safely distributes it to different circuits throughout your building. Whether in a home or an industrial facility, this box keeps your electrical setup organized, functional, and efficient. It serves as a central hub for distributing electricity throughout a building, ensuring that power is delivered safely and efficiently to all the required locations. Plastic electrical boxes are a great option for DIY home remodelers as they are lightweight, affordable, and easy to work with. They are often used when adding outlets or switches to finished walls or ceilings.
[PDF]
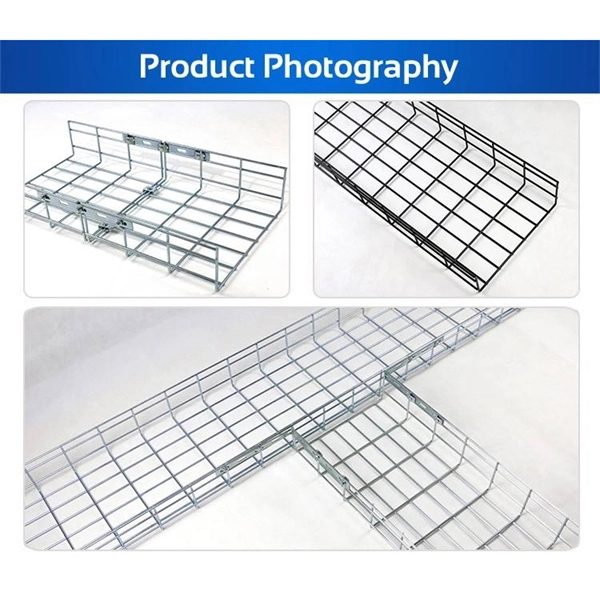
Find out how you can install cable trays faster and easier with our innovative patented product Hermi® Fast Joint. In the video, you will be able to see a comparison between using Fast Joint or bolts and nuts to connect two cable trays. Article Summary: A compliant cable tray installation requires a thorough understanding of NEC Article 392, proper structural support, and precise installation techniques. This guide covers the critical steps, from selecting the right electrical cable tray and performing accurate cable fill. Whether you're building a commercial setup or upgrading an industrial plant, proper cable tray installation ensures neat wiring, safe access, and easy maintenance. But before you lay the first tray or clamp down a single cable, you need a solid plan. This guide breaks down the process step by step. Here is a step-by-step guide on how to install a standard metal cable tray system (e., ladder or perforated type). Before starting, ensure you have. In order to begin the job, trace a straight line where the trays will pass. This is most appropriately done using a laser level. It casts a clear light beam on the ceiling or wall that will enable an individual to determine whether the course is completely straight before any holes are drilled. The key requirements for cable tray installation include: Incorrect installation can lead to overheating, cable damage, or system failure.
[PDF]

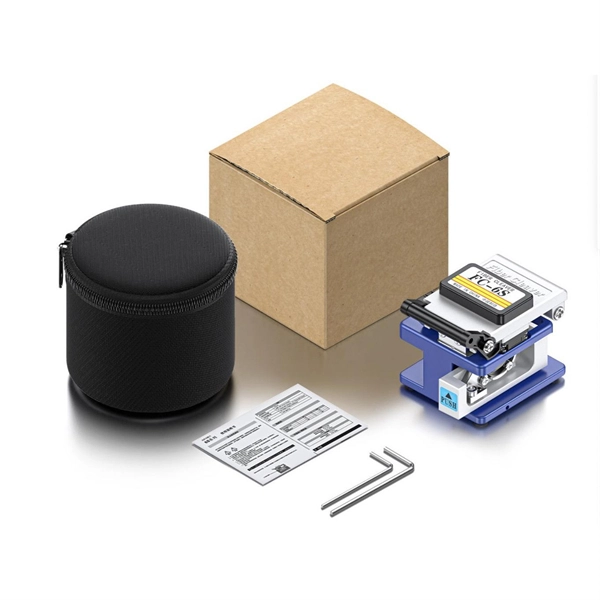
This video provides a step-by-step guide on how to efficiently install optical splitter into a fiber terminal box, demonstrating a professional and reliable deployment for optical distribution network solution ( https://www. com/c/optical-distribu. The following is a guide to installing and using a fiber optic splitter, including key steps and precautions: Required tools: Fiber cleaver, wire stripper, alcohol wipes/cleaning pen, optical power meter. Splitter Type: Choose a PLC type (uniform splitting) or an FBT type (non-uniform splitting). This adapter effectively provides Ethernet data and DC power to a non-PoE device with a single cable and allows it to operate within a PoE network. PoE is an efficient and convenient solution for remote applications where available space is limited and/or no power source is readily available. This manual provides safety and installation instructions for the 9490-OS Fiber Optic Passive Splitters. All units use type LC connectors and vary only in the splitting fan-out, and as single or dual-channel capability as listed below. All units are entirely passive and require no frame power or. After installing the mounting box or bracket, feed the 4-pair UTP (Unshielded Twisted Pair) cable through the wall opening. Strip off approximately 2" of the cable jacket, using the appropriate cable stripping tool. Separate the pairs according to color (Blue/Blue-White,Orange/Orange-White.
[PDF]
Compare cable tray costs by type, material, and installation. Find the most cost-effective option for your project in this detailed buyer's guide. Cable tray pricing depends on materials, coatings, size, supplier margins, and order quantity —plus hidden costs like shipping and installation. This guide breaks down everything buyers need to know, from price trends to cost-saving tips. The average cable tray price per meter ranges from $2 to. How Much Do Cable Trays Cost? A 2026 Comparison vs. The majority of individuals will consider the cost of the components. But the actual price is the cash outlay to the workers to assemble the. Understanding the cable tray installation cost per meter is essential for effective budget planning. Additional elements like supports, connectors, and brackets. Ask ten buyers about cable tray cost, and most of them will point to the rate per meter. That number matters, but it's rarely the one that decides whether a project stays within budget. The real cost shows up later, during installation, during upgrades, and during the first few years of operation. Long span cable trays are at the forefront of this trend, enabling fewer support structures and lower installation costs for large-scale projects. Established in the year 2001, we are among the prominent names who deal in cable tray systems to satisfy the industrial standards of Africa.
[PDF]
Position the Distribution Box on level virgin soil. Do not place box on a concrete slab. Install the inlet pipe and outlet pipes. Backfill the pipes to within two feet of. How to install a distribution box. Subscribe & Share #akelectricals313#313#108@akelectricals313#. Covers wiring, placement, standards, and expert tips for a compliant setup. It takes the incoming power and safely distributes it to different circuits throughout your building. Plastic electrical boxes are a great option for DIY home remodelers as they are lightweight, affordable, and easy to work with. They are often used when adding outlets or switches to finished walls or ceilings. Before installing a plastic electrical box, it is crucial to turn off the power at the. Whether you are an electrical contractor or a construction brigade, knowing how to properly and safely install distribution boxes is the basis of ensuring the safe operation of the entire system. This article details the process of installing them, which helps you comprehend distribution boxes. Step-by-step instructions on how to install the Polylok 12" distribution or drainage box. Polylok, Inc. is an international supplier for the precast concrete and onsite wastewater industries, producing high-grade septic tank Solution and product.
[PDF]
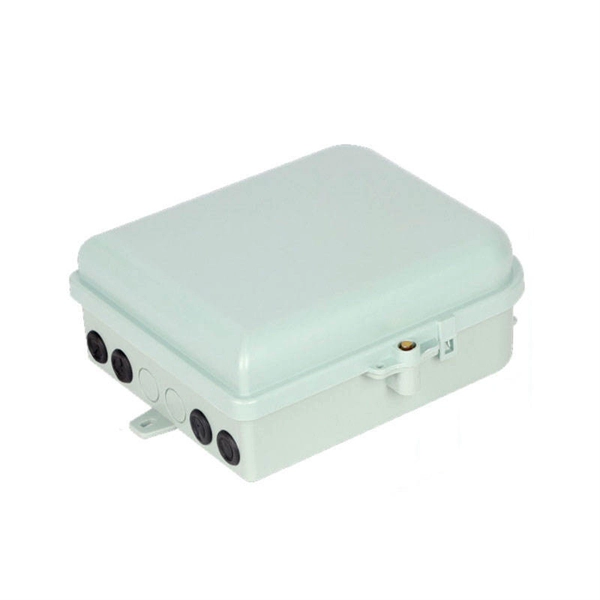
Proper installation and maintenance of distribution cabinets are crucial for ensuring the safety and reliability of the electrical system. Choose the right box based on environment (indoor/outdoor), load capacity, and durability. Check for proper IP/NEMA ratings and material quality. Let's see what factors need to be taken care of when choosing the installation place. Accessibility is one of the most. Hi everyone, in this video, let's connect and install the distribution cabinet for the apartment. #electrical #electrician. more DISTRIBUTION ELECTRICAL CABINET CONNECTION PROJECT. #electrical. A cable distribution box is an electrical device used to collect, distribute, and protect electrical power. It is usually equipped with circuit breakers, fuses, terminal connectors, and other components. It is mainly used to isolate fault circuits, prevent overload, and ensure the safe operation of. duct, please dispose the pro ormal operation due to poor manufacture quality. A paid repair will be provided if the warranty period expires. For single row. - For surface-mounted distribution boxes on the wall, the indoor ceiling, wall, and decoration should be completed before installation; for flush-mounted control (distribution) boxes, the reserved holes, and conduits for power and lighting wiring should be inspected and qualified.
[PDF]
Use wire strippers to strip 3⁄4 inch (19 mm) of casing insulation off the end of every wire going into the junction box. Twist the exposed ends of the same-colored wires together with a pair pf pliers. Use a wire nut to connect multiple wires and push them into the box before. Learn how to install a distribution box safely and correctly. Covers wiring, placement, standards, and expert tips for a compliant setup. A distribution box is the heart of any electrical system. It takes the incoming power and safely distributes it to different circuits throughout your building. In this video, we'll walk you through the process of wiring a home distribution box with a detailed connection diagram. Whether you're an electrician or a DIY enthusiast, this guide will help you understand the basics of home electrical distribution. more Welcome to our channel! In this video. Before you begin installing a distribution box, make sure you have the right tools and materials. Below is a quick checklist of everything you will need for a safe and efficient installation: Connecting a distribution box involves several steps to ensure proper electrical flow. Let's see what factors need to be taken care of when choosing the installation place. It is usually equipped with circuit breakers, fuses, terminal connectors, and other components. And all the switching and protective devices are installed in the.
[PDF]
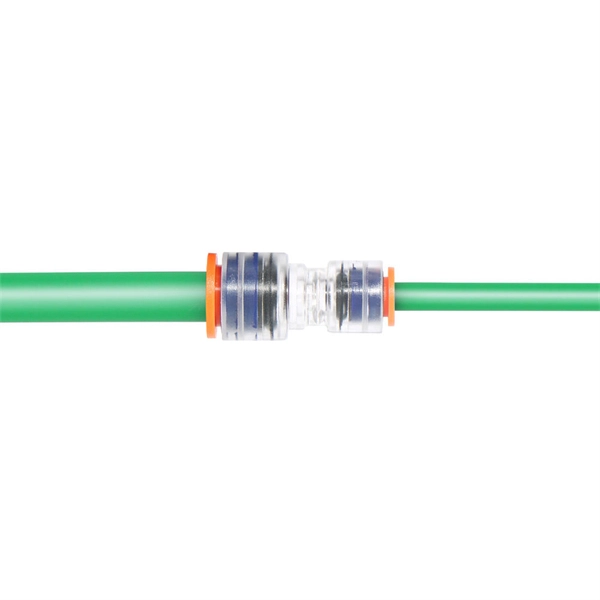
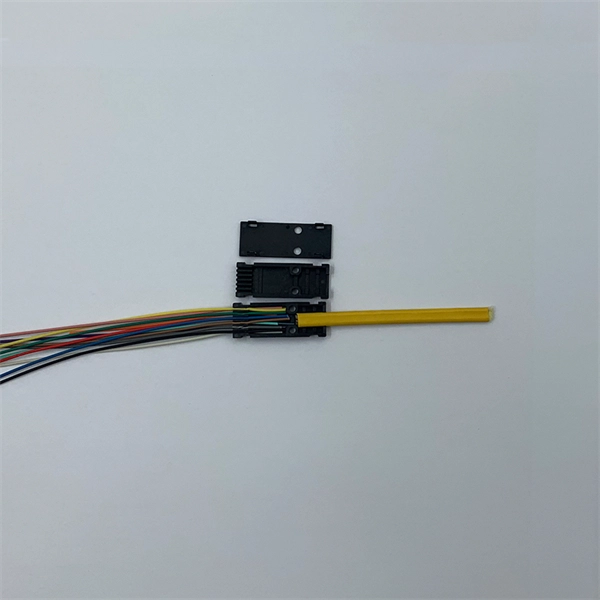
How to correctly install the splice protection sleeve after the Fiber Fusion splicing. A spliced bare fiber is very fragile. so a protection is necessary. it's a transparent tube that acts as a strong. The sleeve must match the fiber cable dimensions and installation method, whether it is heat-shrink, braided, or wrap-around. Incorrect sizing can compromise the effectiveness of the fiber. Correct patch-cord installation is essential for maintaining low insertion loss, stable return loss, and long-term reliability in both indoor and outdoor fiber networks. Whether you're connecting a data center, a corporate network, or a high-density fiber infrastructure, correct installation methods are essential. Yingda. Proper installation and regular maintenance of fiber optic patch cords play a crucial role in achieving optimized network performance, preventing signal errors, and extending service life. This guide addresses expert-certified best practices applied by professionals in the telecommunications, data. NS Comm provides enterprise-grade fiber optic patch cables engineered for maximum reliability and low-loss performance. However, proper installation techniques are essential to unlock their full potential. This guide will help you understand fiber construction, installation steps, real attenuation.
[PDF]