Find out how you can install cable trays faster and easier with our innovative patented product Hermi® Fast Joint. In the video, you will be able to see a comparison between using Fast Joint or bolts and nuts to connect two cable trays. Article Summary: A compliant cable tray installation requires a thorough understanding of NEC Article 392, proper structural support, and precise installation techniques. This guide covers the critical steps, from selecting the right electrical cable tray and performing accurate cable fill. Whether you're building a commercial setup or upgrading an industrial plant, proper cable tray installation ensures neat wiring, safe access, and easy maintenance. But before you lay the first tray or clamp down a single cable, you need a solid plan. This guide breaks down the process step by step. Here is a step-by-step guide on how to install a standard metal cable tray system (e., ladder or perforated type). Before starting, ensure you have. In order to begin the job, trace a straight line where the trays will pass. This is most appropriately done using a laser level. It casts a clear light beam on the ceiling or wall that will enable an individual to determine whether the course is completely straight before any holes are drilled. The key requirements for cable tray installation include: Incorrect installation can lead to overheating, cable damage, or system failure.
[PDF]
Looking at a typical 4 core fiber optic cable price list from OWIRE, prices start around $0. 40 per meter for basic indoor distribution cables and can go up to $1. Fiber-optic cable materials typically cost $1 to $6 per linear foot, depending on fiber count and cable type. Commercial building installations with 100-200 network drops generally range from $15,000 to $30,000. Single-mode fiber costs less per foot than multimode fiber, but it requires more. The actual price of such cables varies significantly based on several factors including cable type (single-mode vs. multimode), length, jacket material (indoor, outdoor, or armored), installation environment, and brand reputation. Labor dominates the installed price. Here is the 2026 benchmark for cost of laying fiber optic cable per foot by method: Open trench (lawn/field): $0. 80 per ft – fastest, lowest cost. This guide presents ranges in USD and practical price estimates to help. Single-mode fiber (OS2): This is the industry workhorse. In 2025, the base glass price has stabilized. You are looking at $0. The price swing usually depends on the fiber count (e., 12-core vs 96-core) and brand. Generic. Knowing how much fiber optic cable costs, which factors can impact cost, and key cost considerations can help you avoid unnecessary expense and get the most out of your budget.
[PDF]
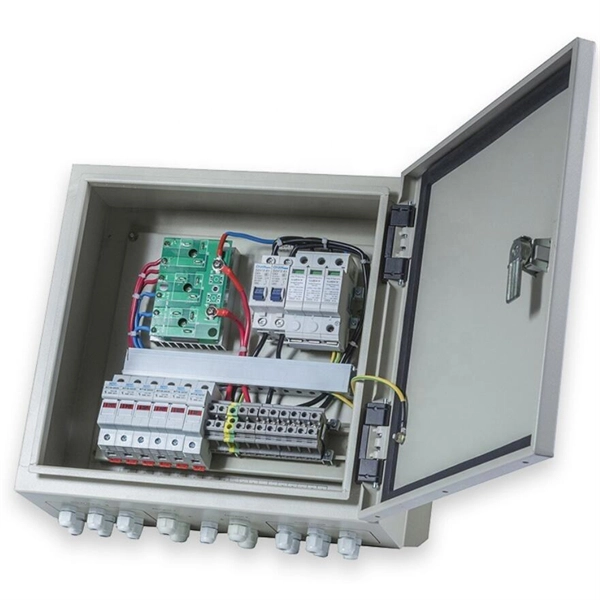
Buyers typically pay a broad range for replacing a distribution box, driven by box size, amperage, wiring runs, and local labor rates. This article outlines the cost factors, price ranges, and practical budgeting advice for a U. In this guide, we'll break down everything you need to know to install a distribution box correctly and confidently. Choose the right box based on environment (indoor/outdoor), load capacity, and durability. Check for proper IP/NEMA ratings and material quality. Ensure safe placement: install in. Whether you are an electrical contractor or a construction brigade, knowing how to properly and safely install distribution boxes is the basis of ensuring the safe operation of the entire system. Whether it is residential buildings, commercial facilities or industrial sites, the. Learn how to wire a distribution box step by step! This video shows real on-site footage of electrical installation, demonstrating safe and standardized wiring methods used by professionals. A well-chosen and properly installed distribution box can prevent electrical hazards, reduce downtime, and ensure your electrical system operates smoothly for years to come. Cost and price details focus on realistic estimates.
[PDF]
HUAWEI WDM replacing the optical module video shows you how to replace an optical module. HUAWEI WDM Documentation:. This section describes how to install an optical module. The method used to install a copper transceiver module is the same, except that the copper transceiver module connects to a network cable instead of optical fibers. Never look directly into an optical module or the ends of optical fibers. Step 2: Take out the optical module, ring and label up, the gold finger is facing down, Note that the right. To avoid component damage caused by improper operation, we should strictly follow the following procedures for installation. 6 Parts Replacement l The BMC serial port, SYS serial port, and GE electrical port are standard RJ-45 ports, and their cables can be installed in the same way.
[PDF]
To plan your patch panel port density and rack cable layout, first estimate how many ports you need in your rack. Rack height is measured in rack units (U). 75. This guide explains how system integrators choose the right port density based on rack layout, patch cord volume, and long-term serviceability (not just “it fits in 1U”). If you're comparing options for a build, start with AMPCOM Patch Panels. Choose a 24-port patch panel when you care about clean. Learn Cat6A requirements for Wi-Fi 7, PoE++ thermal management, SFP+ uplinks, and proper installation techniques for 10Gbps infrastructure. Modern network racks face new physical constraints: deeper switches, hotter PoE++ loads, and thicker Cat6A cabling. Follow these nine simple steps and you'll quickly bring order out of chaos. Split the cable bundle before routing it to the rack. Route the cable and connectors that will. Creating a rack diagram is an important step to having sustainable good cable management in the network cabinet. Rack Elevation or Server Rack Layout Software are simple tools to plan and document the cabling of your server cabinet. To make it even easier for you, we launched the free online Rack. How do you figure out the right number of rack units for your network rack? Labeling your server and network racks and why you really need to do it! Check out the video for all of this information! What is a server and/or network rack and how do they compare? Server racks, from a strict technical.
[PDF]
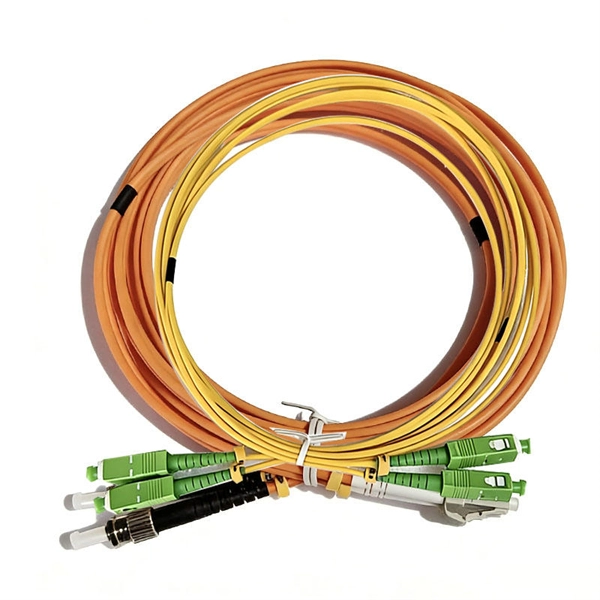
This guide provides a complete installation process for armored fiber optic cords, explaining each step from routing and pulling to stripping, cleaning, and testing. It also highlights key differences from standard fiber cables and important precautions to ensure safety and. This article provides practical guidance on how to install armored fiber cables safely, covering key considerations, step-by-step procedures, and addressing common questions. With proper. ShowMeCables offers a wide range of armored fiber optic cables featuring same-day shipping. These armored fiber cables provide network safety without compromising flexibility or performance. This. The armoured patch cord is engineered for environments where a standard patch cord would be prone to damage. Robust Internal. The armored fiber optic cable is to wrap a layer of protective “armor” on the outside of the optical fiber, which is mainly used to meet the requirements of anti-rodent and moisture resistance. This cable is used within buildings to provide high-density connectivity and ease of installation. Interlocking aluminum armor eliminates the need for inner duct or conduit to provide a smal er crush resistant.
[PDF]
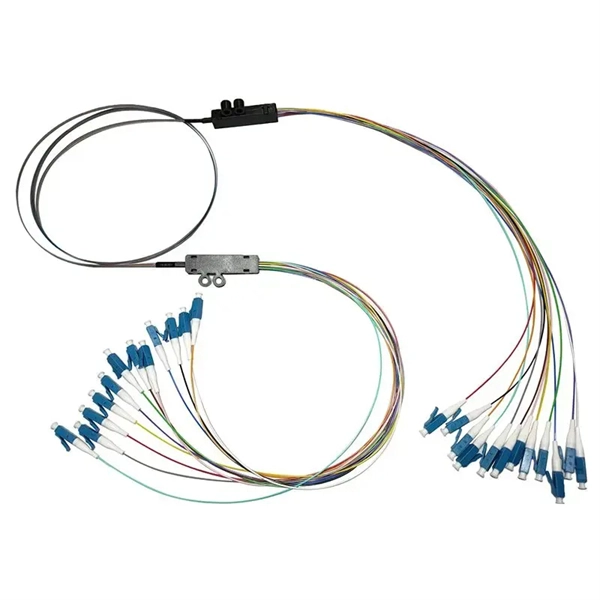
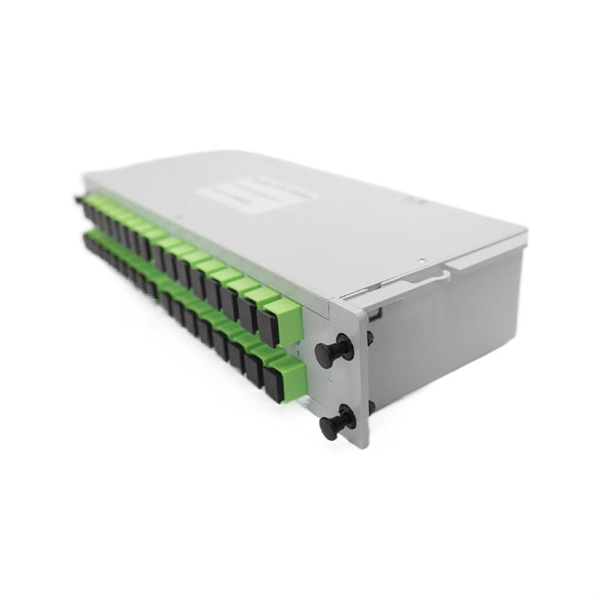
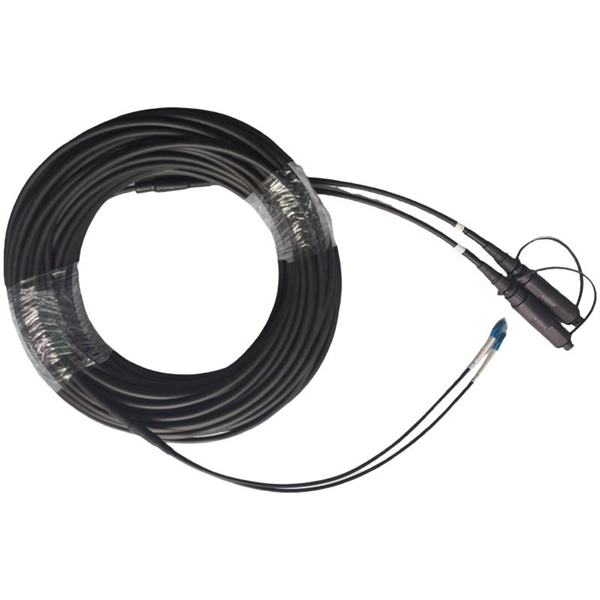
Splice the Pigtail:Fusion-splice incoming fiber to pigtail inside the box. Test:Verify light levels: -27 dBm to -8 dBm (GPON ideal). A fiber termination box is the standard instrument used in fiber optic networks to connect, secure, and protect optical fibers at the terminating point. It functions as a junction between the incoming fiber cable and the outgoing customer-side fiber cable, where one fiber can be spliced, patched. While a cut or damaged fiber optic cable can temporarily take your network down, it is possible to quickly fix the cable with the right tools. This wikiHow article will teach you how to splice a cut fiber optic cable back together with a fiber optic stripper and cutter and a fiber optic crimper. Proper installation and maintenance of FTBs are essential to ensure the reliability and performance of the network infrastructure. After an optical cable arrives at the user's end, it is fixed in the terminal box. These. To establish easy and safe installation put the box where it will be installed and measure the required length of the cable. 5 meter or more, to. Learn how to install a fiber optic termination box step-by-step for FTTH projects. Covers mounting, splicing, routing, labeling, and testing for indoor/outdoor use. Installing a fiber optic termination box is one of those jobs that looks simple on paper, but it's easy to do poorly in the field.
[PDF]
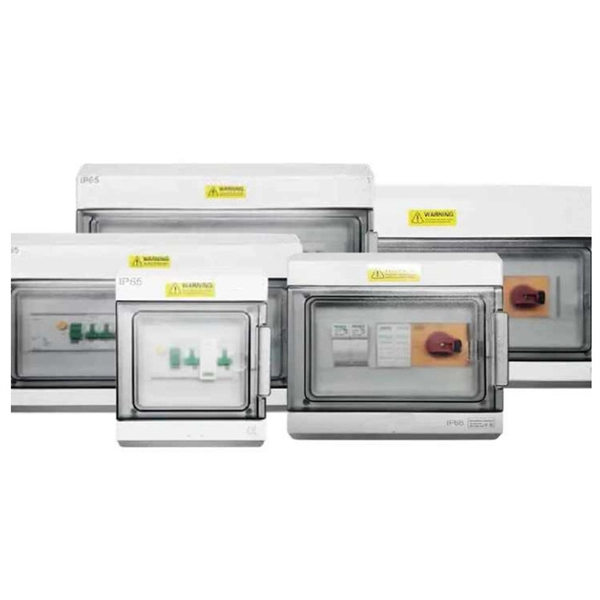
In this step-by-step tutorial, we'll cover: ✅ Tools you need ✅ Safety precautions ✅ Mounting the box ✅ Wiring tips ✅ Final checks Perfect for beginners, DIYers, and electricians who want a clear installation guide. more Learn how to properly install an electrical box safely. An electrical distribution box, also known as a power distribution box, panelboard, or consumer unit, is the core of an electrical system. It has three categories: residential, commercial and industrial electrical distribution boxes, all of which play important roles in their respective electrical. In this guide, we'll break down everything you need to know to install a distribution box correctly and confidently. Choose the right box based on environment (indoor/outdoor), load capacity, and durability. Check for proper IP/NEMA ratings and material quality. It serves as a central hub for distributing electricity throughout a building, ensuring that power is delivered safely and efficiently to all the required locations. In this video, we'll walk you through the process of wiring a home distribution box with a detailed connection diagram. Whether you're an electrician or a DIY enthusiast, this guide will help you understand the basics of home electrical distribution. What is Distribution Board? Distribution board.
[PDF]
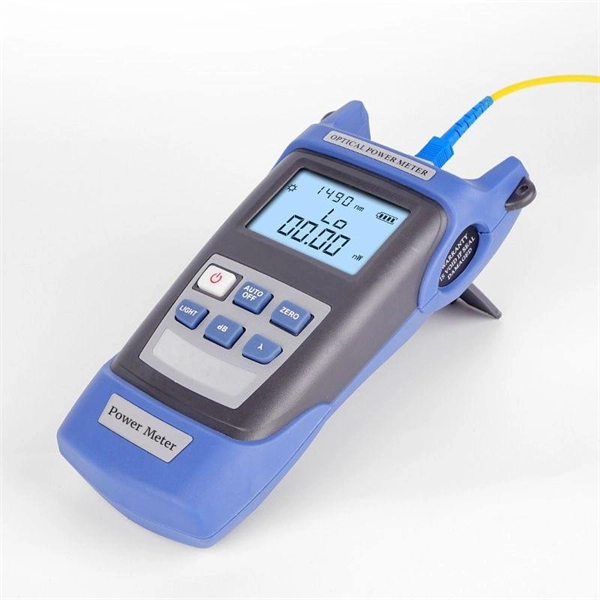
To check a fiber connection, connect a jumper to the optical source port and the other end to an optical meter. Press the “test” or “signal” button to send a signal from the source to the meter. While there are many different fiber optic cable tests, the most common version is an insertion loss test, also known as an attenuation, jumper, or connectivity test. This test requires a special testing kit and protective eyewear, but it will help you diagnose problems with the cable's. We'll explain why it's vital to test fiber optic cables, the three most popular methods, and when you should use them. Related: Fiber Optic Connectors – Identification Guide Regularly testing fiber optic cables helps minimize network downtime, lengthens the network's longevity, reduces maintenance. In this guide, we'll explore effective methods to check your fiber connection, including tools required and common issues to look out for. Below is an in-depth guide on how to assess the health and performance of a fiber optic connection: Before relying on technical tools, start. Whether you're a professional or a DIY enthusiast, knowing how to test fiber optic cables is crucial. In this blog, we'll explore different methods, including using a flashlight, advanced tools like Fluke testers, and more cost-effective options for testing fiber optics. In fiber optic communication, data is transmitted over two strands of fiber: one for.
[PDF]
Key price drivers include cable type, fiber count, and installation complexity. data-formula=”cost = (length × cable price) + labor + permits + equipment + contingency”> In fiber projects, two niche-specific factors matter: (1) whether single-mode or multimode fiber is used . Fiber optic splicing costs vary widely depending on project size, location, fiber type, and site conditions. For most commercial projects, expect to pay $50–$150 per fusion splice point - but that number can swing in either direction based on the factors below. The "per splice" rate is the most. The price of fiber optic cabling depends on cable type, length, installation method, and surrounding materials. Typical costs hinge on fiber count, indoor versus outdoor use, and whether trenching, splicing, or termination is required. This guide provides practical ranges in USD and practical price. The cost of fibre splicing is significantly influenced by the equipment and tools needed for the process. High-quality fusion splicers are essential for precision and reliability, but they come with a hefty price tag. a mechanical splice of $5-12. On the surface of it, fusion splicing is less expensive. But when you add in the cost of the setup time for one splice, it more than negates the cost savings of the splice by adding the labor time. This guide lays out cost expectations, with clear low–average–high estimates and regional nuances.
[PDF]
While there are situations when you will have to route cable through structural members such as studs, joists, and rafters, the job is much easier if you can run the cable along the surfaces of these frames. When you have a situation where you need to run cable through. Running new wiring within existing, finished walls of a wood-framed structure is a common necessity for home upgrades, whether for installing low-voltage data and audio cables or for extending line-voltage electrical circuits. Another is to conceal the cords and cables within the walls. This guide will help you learn how to run low voltage cables through the wall using low voltage boxes and face plates. To learn how to add. Many home improvement projects require you to install new electrical cables inside finished walls. The process is often called "snaking" or "fishing," with good reason. Cables often must be bent, slithered and coaxed around stud spaces and through small holes in the framing. Click on any image to see a larger version. When installing an electrical box, drill a hole in the floor between the studs on the same side as the electrical box. Staple down the wire right above the hole and. Method One: In order to cut the panel correctly, you first need to make the right measurements. Mark this distance on the panel you will be using. Make sure to mark this from the top.
[PDF]
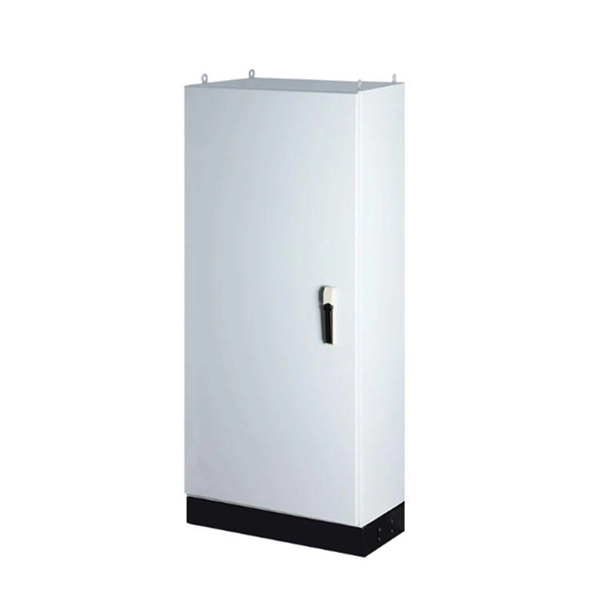
Proper installation and maintenance of distribution cabinets are crucial for ensuring the safety and reliability of the electrical system. Choose the right box based on environment (indoor/outdoor), load capacity, and durability. Check for proper IP/NEMA ratings and material quality. Let's see what factors need to be taken care of when choosing the installation place. Accessibility is one of the most. Hi everyone, in this video, let's connect and install the distribution cabinet for the apartment. #electrical #electrician. more DISTRIBUTION ELECTRICAL CABINET CONNECTION PROJECT. #electrical. A cable distribution box is an electrical device used to collect, distribute, and protect electrical power. It is usually equipped with circuit breakers, fuses, terminal connectors, and other components. It is mainly used to isolate fault circuits, prevent overload, and ensure the safe operation of. duct, please dispose the pro ormal operation due to poor manufacture quality. A paid repair will be provided if the warranty period expires. For single row. - For surface-mounted distribution boxes on the wall, the indoor ceiling, wall, and decoration should be completed before installation; for flush-mounted control (distribution) boxes, the reserved holes, and conduits for power and lighting wiring should be inspected and qualified.
[PDF]
Cable tray pricing depends on materials, coatings, size, supplier margins, and order quantity —plus hidden costs like shipping and installation. This guide breaks down everything buyers need to know, from price trends to cost-saving tips. Cable Tray is a made from versatile material that offers numerous benefits across a wide range of applications. Here are several reasons why you should consider choosing Cable Tray in Paraguay: Wire mesh is made from sturdy Cable Tray, metal wires woven or welded together, making it highly. We offer Cable Tray in Paraguay in different specifications at competitive market prices. Our range is customized and passes stringent quality tests, before reaching the market. As one of the best Cable Tray Manufacturers in Paraguay, we offer modular products, superior quality in customized. Buy Cable Trays in Paraguay from Cable Trays Manufacturers in Paraguay. Brilltech Engineers a Cable Trays suppliers in Paraguay, exporters. Call +91- 9818292266. How Much Do Cable Trays Cost? A 2026 Comparison vs. The majority of individuals will consider the cost of the components. Our custom-based products are able to match up your distinct needs. The average cable tray price per meter ranges from $2 to.
[PDF]
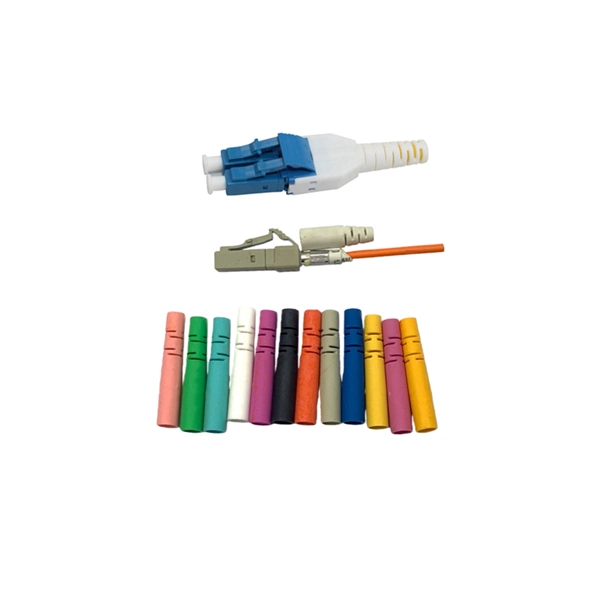
How to correctly install the splice protection sleeve after the Fiber Fusion splicing. A spliced bare fiber is very fragile. so a protection is necessary. it's a transparent tube that acts as a strong. The sleeve must match the fiber cable dimensions and installation method, whether it is heat-shrink, braided, or wrap-around. Incorrect sizing can compromise the effectiveness of the fiber. Correct patch-cord installation is essential for maintaining low insertion loss, stable return loss, and long-term reliability in both indoor and outdoor fiber networks. Whether you're connecting a data center, a corporate network, or a high-density fiber infrastructure, correct installation methods are essential. Yingda. Proper installation and regular maintenance of fiber optic patch cords play a crucial role in achieving optimized network performance, preventing signal errors, and extending service life. This guide addresses expert-certified best practices applied by professionals in the telecommunications, data. NS Comm provides enterprise-grade fiber optic patch cables engineered for maximum reliability and low-loss performance. However, proper installation techniques are essential to unlock their full potential. This guide will help you understand fiber construction, installation steps, real attenuation.
[PDF]
Learn how to properly install an electrical box safely and efficiently. In this step-by-step tutorial, we'll cover: ✅ Tools you need ✅ Safety precautions ✅ Mounting the box ✅ Wiring tips ✅ Final checks Perfect for beginners, DIYers, and electricians who want a clear. Electrical installation is one of the most important stages of any remodeling project. Whether it's a new bedroom, a finished basement, an attic conversion, or an addition, the wiring must be organized, code-compliant, and installed with clear planning. Poor electrical layout creates fire risks. Answer: One method I have used to install an electrical box in a narrow space is to mount the box on a short piece of wood. The finished electrical box rough-in wiring is ready for inspection. In this step-by-step tutorial, we'll cover: ✅ Tools you need. Covers wiring, placement, standards, and expert tips for a compliant setup. A distribution box is the heart of any electrical system. It takes the incoming power and safely distributes it to different circuits throughout your building. A junction box provides a code-approved place to house wire connections, whether for outlets, switches, or splices. Here's how to install one. We may be compensated if you purchase through links on our website. Our team is committed to delivering honest, objective, and independent reviews on home.
[PDF]