While there are situations when you will have to route cable through structural members such as studs, joists, and rafters, the job is much easier if you can run the cable along the surfaces of these frames. When you have a situation where you need to run cable through. Running new wiring within existing, finished walls of a wood-framed structure is a common necessity for home upgrades, whether for installing low-voltage data and audio cables or for extending line-voltage electrical circuits. Another is to conceal the cords and cables within the walls. This guide will help you learn how to run low voltage cables through the wall using low voltage boxes and face plates. To learn how to add. Many home improvement projects require you to install new electrical cables inside finished walls. The process is often called "snaking" or "fishing," with good reason. Cables often must be bent, slithered and coaxed around stud spaces and through small holes in the framing. Click on any image to see a larger version. When installing an electrical box, drill a hole in the floor between the studs on the same side as the electrical box. Staple down the wire right above the hole and. Method One: In order to cut the panel correctly, you first need to make the right measurements. Mark this distance on the panel you will be using. Make sure to mark this from the top.
[PDF]
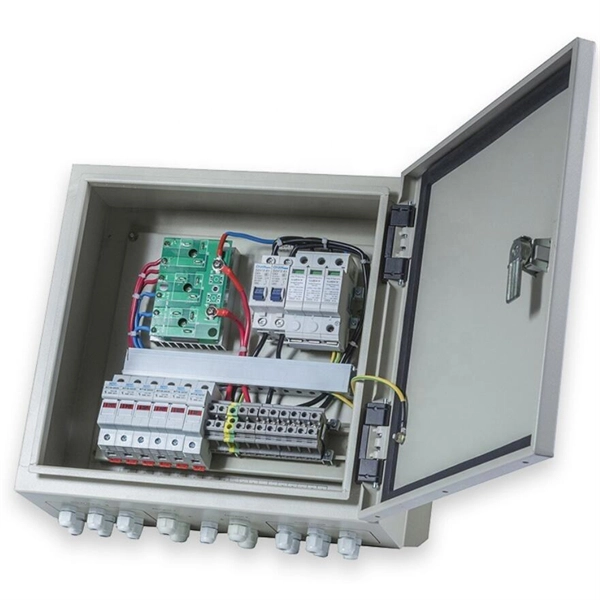
In this step-by-step tutorial, we'll cover: ✅ Tools you need ✅ Safety precautions ✅ Mounting the box ✅ Wiring tips ✅ Final checks Perfect for beginners, DIYers, and electricians who want a clear installation guide. more Learn how to properly install an electrical box . Learn how to install a distribution box safely and correctly. Covers wiring, placement, standards, and expert tips for a compliant setup. A distribution box is the heart of any electrical system. It takes the incoming power and safely distributes it to different circuits throughout your building. Whether you are an electrical contractor or a construction brigade, knowing how to properly and safely install distribution boxes is the basis of ensuring the safe operation of the entire system. Material preparation: Prepare the required circuit breakers, wires, wiring ties and other materials, and ensure that they meet the design drawings and installation requirements. It serves as a central hub for distributing electricity throughout a building, ensuring that power is delivered safely and efficiently to all the required locations.
[PDF]
In this step-by-step tutorial, we'll cover: ✅ Tools you need ✅ Safety precautions ✅ Mounting the box ✅ Wiring tips ✅ Final checks Perfect for beginners, DIYers, and electricians who want a clear installation guide. more Learn how to properly install an electrical box safely. A distribution box is the heart of any electrical system. It takes the incoming power and safely distributes it to different circuits throughout your building. Whether in a home or an industrial facility, this box keeps your electrical setup organized, functional, and efficient. It serves as a central hub for distributing electricity throughout a building, ensuring that power is delivered safely and efficiently to all the required locations. Plastic electrical boxes are a great option for DIY home remodelers as they are lightweight, affordable, and easy to work with. They are often used when adding outlets or switches to finished walls or ceilings.
[PDF]
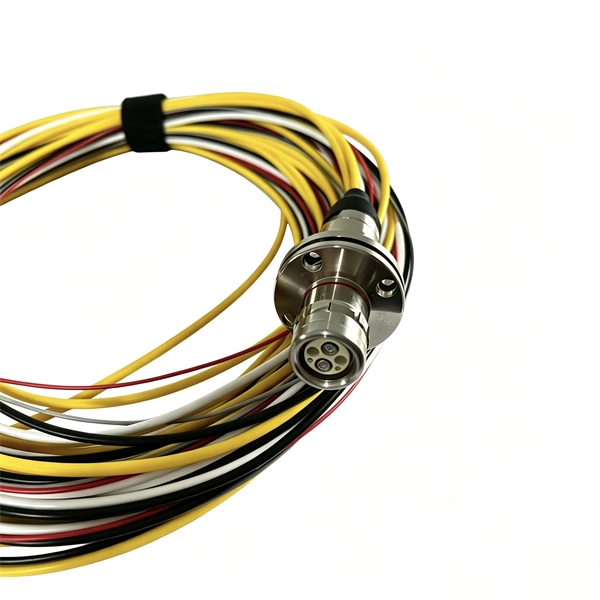
HUAWEI WDM replacing the optical module video shows you how to replace an optical module. HUAWEI WDM Documentation:. This section describes how to install an optical module. The method used to install a copper transceiver module is the same, except that the copper transceiver module connects to a network cable instead of optical fibers. Never look directly into an optical module or the ends of optical fibers. Step 2: Take out the optical module, ring and label up, the gold finger is facing down, Note that the right. To avoid component damage caused by improper operation, we should strictly follow the following procedures for installation. 6 Parts Replacement l The BMC serial port, SYS serial port, and GE electrical port are standard RJ-45 ports, and their cables can be installed in the same way.
[PDF]

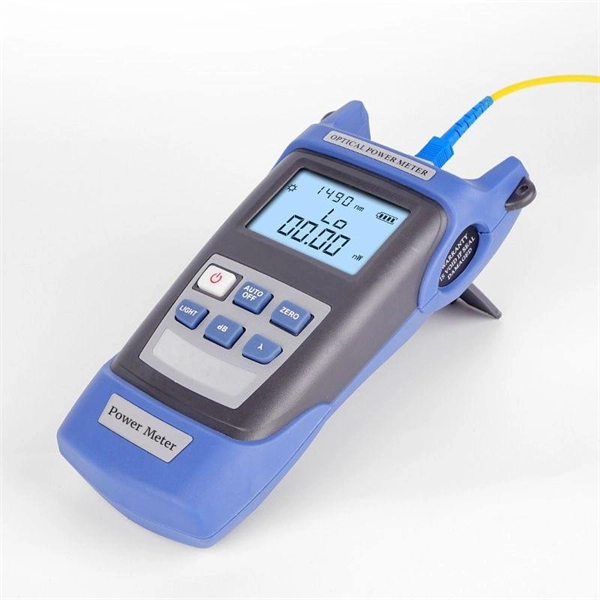
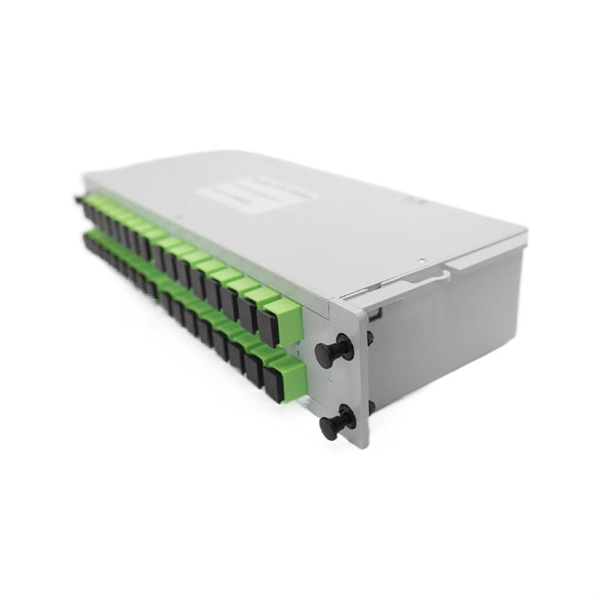
This video provides a step-by-step guide on how to efficiently install optical splitter into a fiber terminal box, demonstrating a professional and reliable deployment for optical distribution network solution ( https://www. com/c/optical-distribu. The following is a guide to installing and using a fiber optic splitter, including key steps and precautions: Required tools: Fiber cleaver, wire stripper, alcohol wipes/cleaning pen, optical power meter. Splitter Type: Choose a PLC type (uniform splitting) or an FBT type (non-uniform splitting). This adapter effectively provides Ethernet data and DC power to a non-PoE device with a single cable and allows it to operate within a PoE network. PoE is an efficient and convenient solution for remote applications where available space is limited and/or no power source is readily available. This manual provides safety and installation instructions for the 9490-OS Fiber Optic Passive Splitters. All units use type LC connectors and vary only in the splitting fan-out, and as single or dual-channel capability as listed below. All units are entirely passive and require no frame power or. After installing the mounting box or bracket, feed the 4-pair UTP (Unshielded Twisted Pair) cable through the wall opening. Strip off approximately 2" of the cable jacket, using the appropriate cable stripping tool. Separate the pairs according to color (Blue/Blue-White,Orange/Orange-White.
[PDF]
In this video, we'll walk you through the process of wiring a home distribution box with a detailed connection diagram. Whether you are an electrical contractor or a construction brigade, knowing how to properly and safely install distribution boxes is the basis of ensuring the safe operation of the entire system. This article details the process of installing them, which helps you comprehend distribution boxes. In modern electrical systems, cable distribution boxes (also known as electrical distribution boxes or distribution boxes) play a crucial role as the key hub for managing, distributing, and protecting circuits. Covers wiring, placement, standards, and expert tips for a compliant setup. A distribution box is the heart of any electrical system. It takes the incoming power and safely distributes it to different circuits throughout your building. What is Distribution Board? Distribution board. Mounting new electrical boxes is a simple process, but the job does require careful planning. You don't have to create a to-scale.
[PDF]
Whether upgrading an aging electrical panel or setting up your facility, this guide will walk you through the critical steps to installing an MCB Distribution Box safely. Whether you are an electrical contractor or a construction brigade, knowing how to properly and safely install distribution boxes is the basis of ensuring the safe operation of the entire system. This article details the process of installing them, which helps you comprehend distribution boxes. Learn how to install a distribution box safely and correctly. Covers wiring, placement, standards, and expert tips for a compliant setup. A distribution box is the heart of any electrical system. It takes the incoming power and safely distributes it to different circuits throughout your building. Learn how to wire a distribution box step by step! This video shows real on-site footage of electrical installation, demonstrating safe and standardized wiring methods used by professionals. It serves as a central hub for distributing electricity throughout a building, ensuring that power is delivered safely and efficiently to all the required locations. A cable. Receiving, handling, storing and install-ing this equipment should only be accomplished by qualified electri-cal personnel. Additional installation information regarding installation procedures following the equipment placement, is covered in the equipment's specific Instruction Booklet.
[PDF]
In this video, we'll walk you through the step-by-step process of installing a distribution board (also known as a breaker panel) safely and efficiently. Choose the right box based on environment (indoor/outdoor), load capacity, and durability. Check for proper IP/NEMA ratings and material quality. It has three categories: residential, commercial and industrial electrical distribution boxes, all of which play important roles in their respective electrical. A cable distribution box is an electrical device used to collect, distribute, and protect electrical power. It is usually equipped with circuit breakers, fuses, terminal connectors, and other components. It is mainly used to isolate fault circuits, prevent overload, and ensure the safe operation of. A residential breaker box, or load center, is the heart of a home's electrical distribution system. This panel routes power from the utility service to every circuit while housing circuit breakers that provide overcurrent protection. Whether you're a beginner or an experienced DIYer, this tutorial will cover everything from selecting the right distribution board to wiring and. When your circuit breaker trips, it's convenient to have your electrical panel in an easy-to-reach location. But you must follow electrical panel location rules when choosing a spot—even if incorporating them into interior design is challenging—and you can't cover them without breaking fire codes.
[PDF]
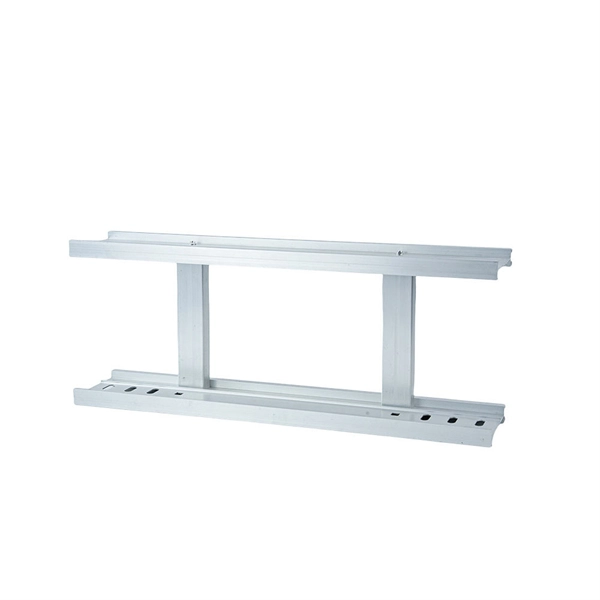
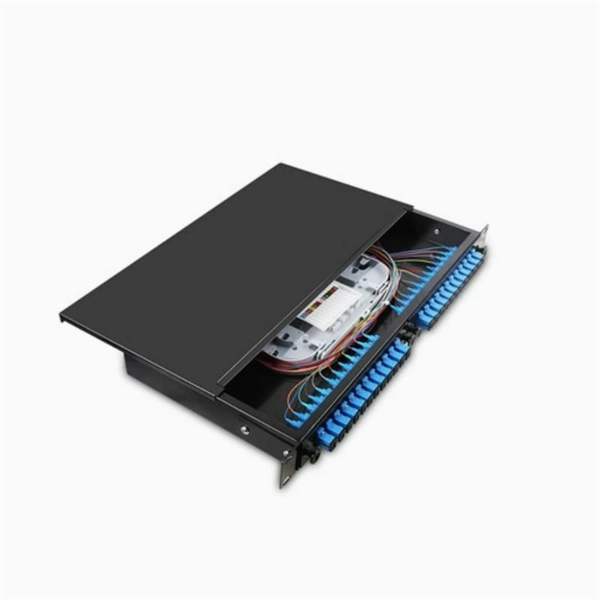
Grommet will be installed after the enclosure is mounted to the rack. Place the mounting brackets at the desired position on the rack. Note: Cover not. Page 1 Care should be taken when opening or closing a fully loaded drawer in order to protect the fiber components. ASSEMBLY VIEW Trunk or interconnect Enclosure cable entry location Fiber Adapter Panels (FAPs): Up to 4 for FCE1U & FCE1UA Up to 8 for FCE2U Strain relief (sold separately) bracket. Simple training video for our teams after pulling the fiber to locations, either the MDF or IDF spots. To secure the fiber and get it ready to splice for the pigtails. Keep in mind various methods or different trays to use, just depends on the layout but most should look like this. Protect the. This guide provides detailed installation steps and precautions to help users successfully install the slide-out rack mount enclosure, improving cabling efficiency and product application effectiveness. What's a Slide-Out Rack Mount Enclosure FS slide-out rack mount enclosure shall house, organize. Keeping this page as a placeholder for now. Have any questions? Talk with us directly using LiveChat. with eyes, flush with water for at least 15 minutes. When using isopropyl alcohol, always assure proper levels of ventilation. Enclosure for use in your equipment cabinet or rack. For detailed inform Opt-X UHD Enclosure, please refer to the table below. Use (2) #12-24 X 1/2" screws (provided). Repeat for other side.
[PDF]
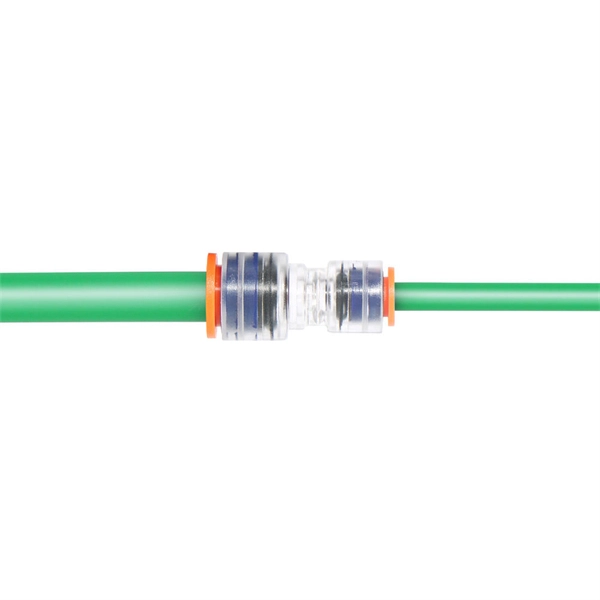
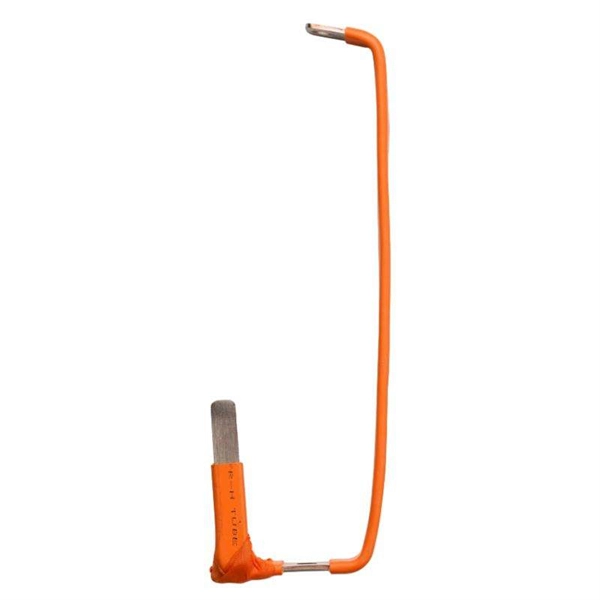
How to correctly install the splice protection sleeve after the Fiber Fusion splicing. A spliced bare fiber is very fragile. so a protection is necessary. it's a transparent tube that acts as a strong. The sleeve must match the fiber cable dimensions and installation method, whether it is heat-shrink, braided, or wrap-around. Incorrect sizing can compromise the effectiveness of the fiber. Correct patch-cord installation is essential for maintaining low insertion loss, stable return loss, and long-term reliability in both indoor and outdoor fiber networks. Whether you're connecting a data center, a corporate network, or a high-density fiber infrastructure, correct installation methods are essential. Yingda. Proper installation and regular maintenance of fiber optic patch cords play a crucial role in achieving optimized network performance, preventing signal errors, and extending service life. This guide addresses expert-certified best practices applied by professionals in the telecommunications, data. NS Comm provides enterprise-grade fiber optic patch cables engineered for maximum reliability and low-loss performance. However, proper installation techniques are essential to unlock their full potential. This guide will help you understand fiber construction, installation steps, real attenuation.
[PDF]
Choose the right box based on environment (indoor/outdoor), load capacity, and durability. Check for proper IP/NEMA ratings and material quality. Ensure safe placement: install in dry, accessible areas with good ventilation and at appropriate height (typically ~1. Wiring distribution panels serve as the central hub and nerve center, routing power from the main service feed to multiple circuits. When setting up such a significant component of industrial, commercial, and utility applications, it's essential to get everything right. When wiring distribution. A distribution box, sometimes referred to as a panel board, distribution board, or breaker panel, is an essential part of electrical systems that makes it easier to distribute electricity throughout a structure. Dividing incoming electrical power from the main supply into subsidiary circuits is the. In this guide, we'll break down everything you need to know to install a distribution box correctly and confidently. You will learn to build a safe, efficient, and professional electrical system today. Circuit breaker wiring configurations involve organizing main switches, busbars, and branch breakers within a distribution box. Material preparation: Prepare the required circuit breakers, wires, wiring ties and other materials, and ensure that they meet the design drawings and installation requirements. And all the switching and protective devices are installed in the.
[PDF]
A neat, well-organized subpanel bundles wires to conserve space and improve access. Ideally, wire groups are installed in layers and wires are bent at right angles to buses or breakers. Label short sheathing sections (slugs) to indicate which circuits wires serve. Choose the right box based on environment (indoor/outdoor), load capacity, and durability. Check for proper IP/NEMA ratings and material quality. Ensure safe placement: install in dry, accessible areas with good ventilation and at appropriate height (typically ~1. Practice good wiring: secure. Box installation: Make sure that Distribution box has been correctly installed and fixed. Material preparation: Prepare the required circuit breakers, wires, wiring ties and other materials, and ensure that they meet the design drawings and installation requirements. And all the switching and protective devices are installed in the. Wiring distribution panels serve as the central hub and nerve center, routing power from the main service feed to multiple circuits. When setting up such a significant component of industrial, commercial, and utility applications, it's essential to get everything right. Labeling cables at outlets is.
[PDF]
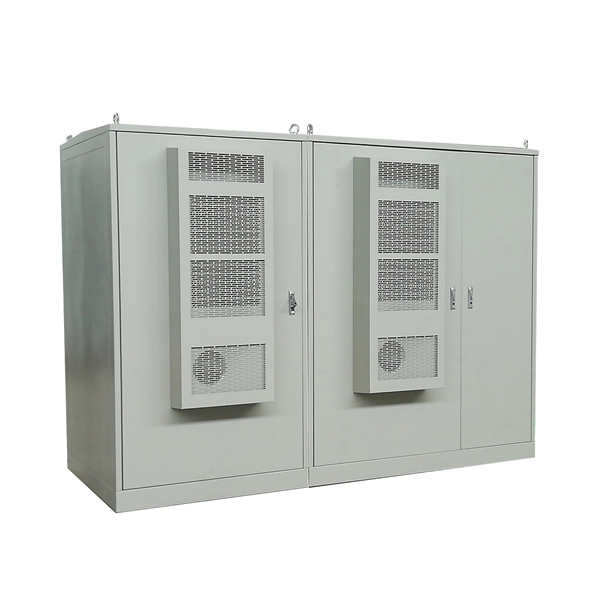
Learn how to install a fiber distribution cabinet step by step, including mounting, cable routing, grounding, and testing for FTTH networks. The installation of a fiber distribution cabinet involves five key steps: site selection, cabinet mounting, cable routing, fiber splicing, and grounding +. This step is very simple, we only need to install brackets on both sides of the optical fiber distribution box, and then fix the brackets to the designated position of the rack with screws. It should be noted that before installing the optical fiber distribution box, the installation direction of. Keeping this page as a placeholder for now. Have any questions? Talk with us directly using LiveChat. Read and understand this procedure (as well as the instructions provided with related assemblies) before beginning an installation. Do not discard this instruction; keep it on hand for future reference. Familiarize yourself to understand the unit's placement in your network. The 1U fiber optic distribution box is used as an example to introduce its structure. Three adapter panels can be installed on the front panel of this fiber optic distribution. Fiber Distribution Hub Installation Procedure - Optical Cable Corporation Products Fiber Copper Hybrid Cabinets, Racks, Enclosures Deployable Solutions Industries Oil & Gas Mining Industrial BroadcastAV Military Commercial Enterprise library & Support Contact Resources About OCC News Careers.
[PDF]
In this step-by-step tutorial, we'll cover: ✅ Tools you need ✅ Safety precautions ✅ Mounting the box ✅ Wiring tips ✅ Final checks Perfect for beginners, DIYers, and electricians who want a clear installation guide. more Learn how to properly install an electrical . Learn how to install a distribution box safely and correctly. Covers wiring, placement, standards, and expert tips for a compliant setup. A distribution box is the heart of any electrical system. It takes the incoming power and safely distributes it to different circuits throughout your building. This article details the process of installing them, which helps you comprehend distribution boxes. Electrical boxes (junction, switch, or receptacle) protect electrical connections from physical damage and accidental contact. Code requires these enclosures to house wire splices and terminations, mitigating the risk of short circuits and electrical fires. Installing and securing the correct box. In modern electrical systems, cable distribution boxes (also known as electrical distribution boxes or distribution boxes) play a crucial role as the key hub for managing, distributing, and protecting circuits. Here's a simple, user-friendly guide to help you through the process. Safety first! Locate the circuit breaker panel in your home and turn off the power to the area.
[PDF]
Shut off seal water and lube inlet and install button head fitting. Remove old packing and lantern ring. Inspect and clean shaft and gland. Install compatible braided packing ring in the bottom of the stuffing box; cut on 45° angle from top to bottom. The following steps have been devised to ensure e ALL THE OLD PACKING FROM THE STUFFING BOX. Clean box and shaft thoroughly and ex mine shaft or sleeve for wear and scoring. Re SS-SECTION OF PACKING OR DIE-FORMED RINGS. To determine the correct packing. In our previous guides, we discussed two common ways to protect rubber O-rings: silicone grease and technical petroleum jelly. Both methods have their advantages. But why is O-ring protection so important? The answer lies in prevention. CHOOSING THE CORRECT. Before starting the installation, finding a proper place for putting the distribution box is crucial, because it largely decides the safety and convenience of maintenance. Accessibility is one of the most. Examine the rings, this will show how the packing was installed. Look for glazing on the OD of packing, this means rings were not preloaded, and they were turning with the shaft. Replace shaft sleeve if. One of the most important steps that is often overlooked in pump packing installation is inserting the rings into the stuffing box. Poor maintenance practices are sometimes used, and these can be really costly with more maintenance time to adjust, more leakage and loss of product, and shorter.
[PDF]